
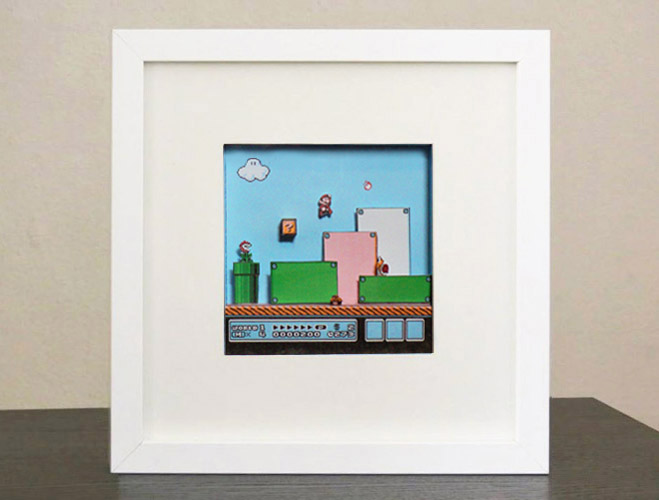
Here is a fun project where you can make a diorama of Super Mario 3 that is showcased in the IKEA Ribba shadow box picture frame.
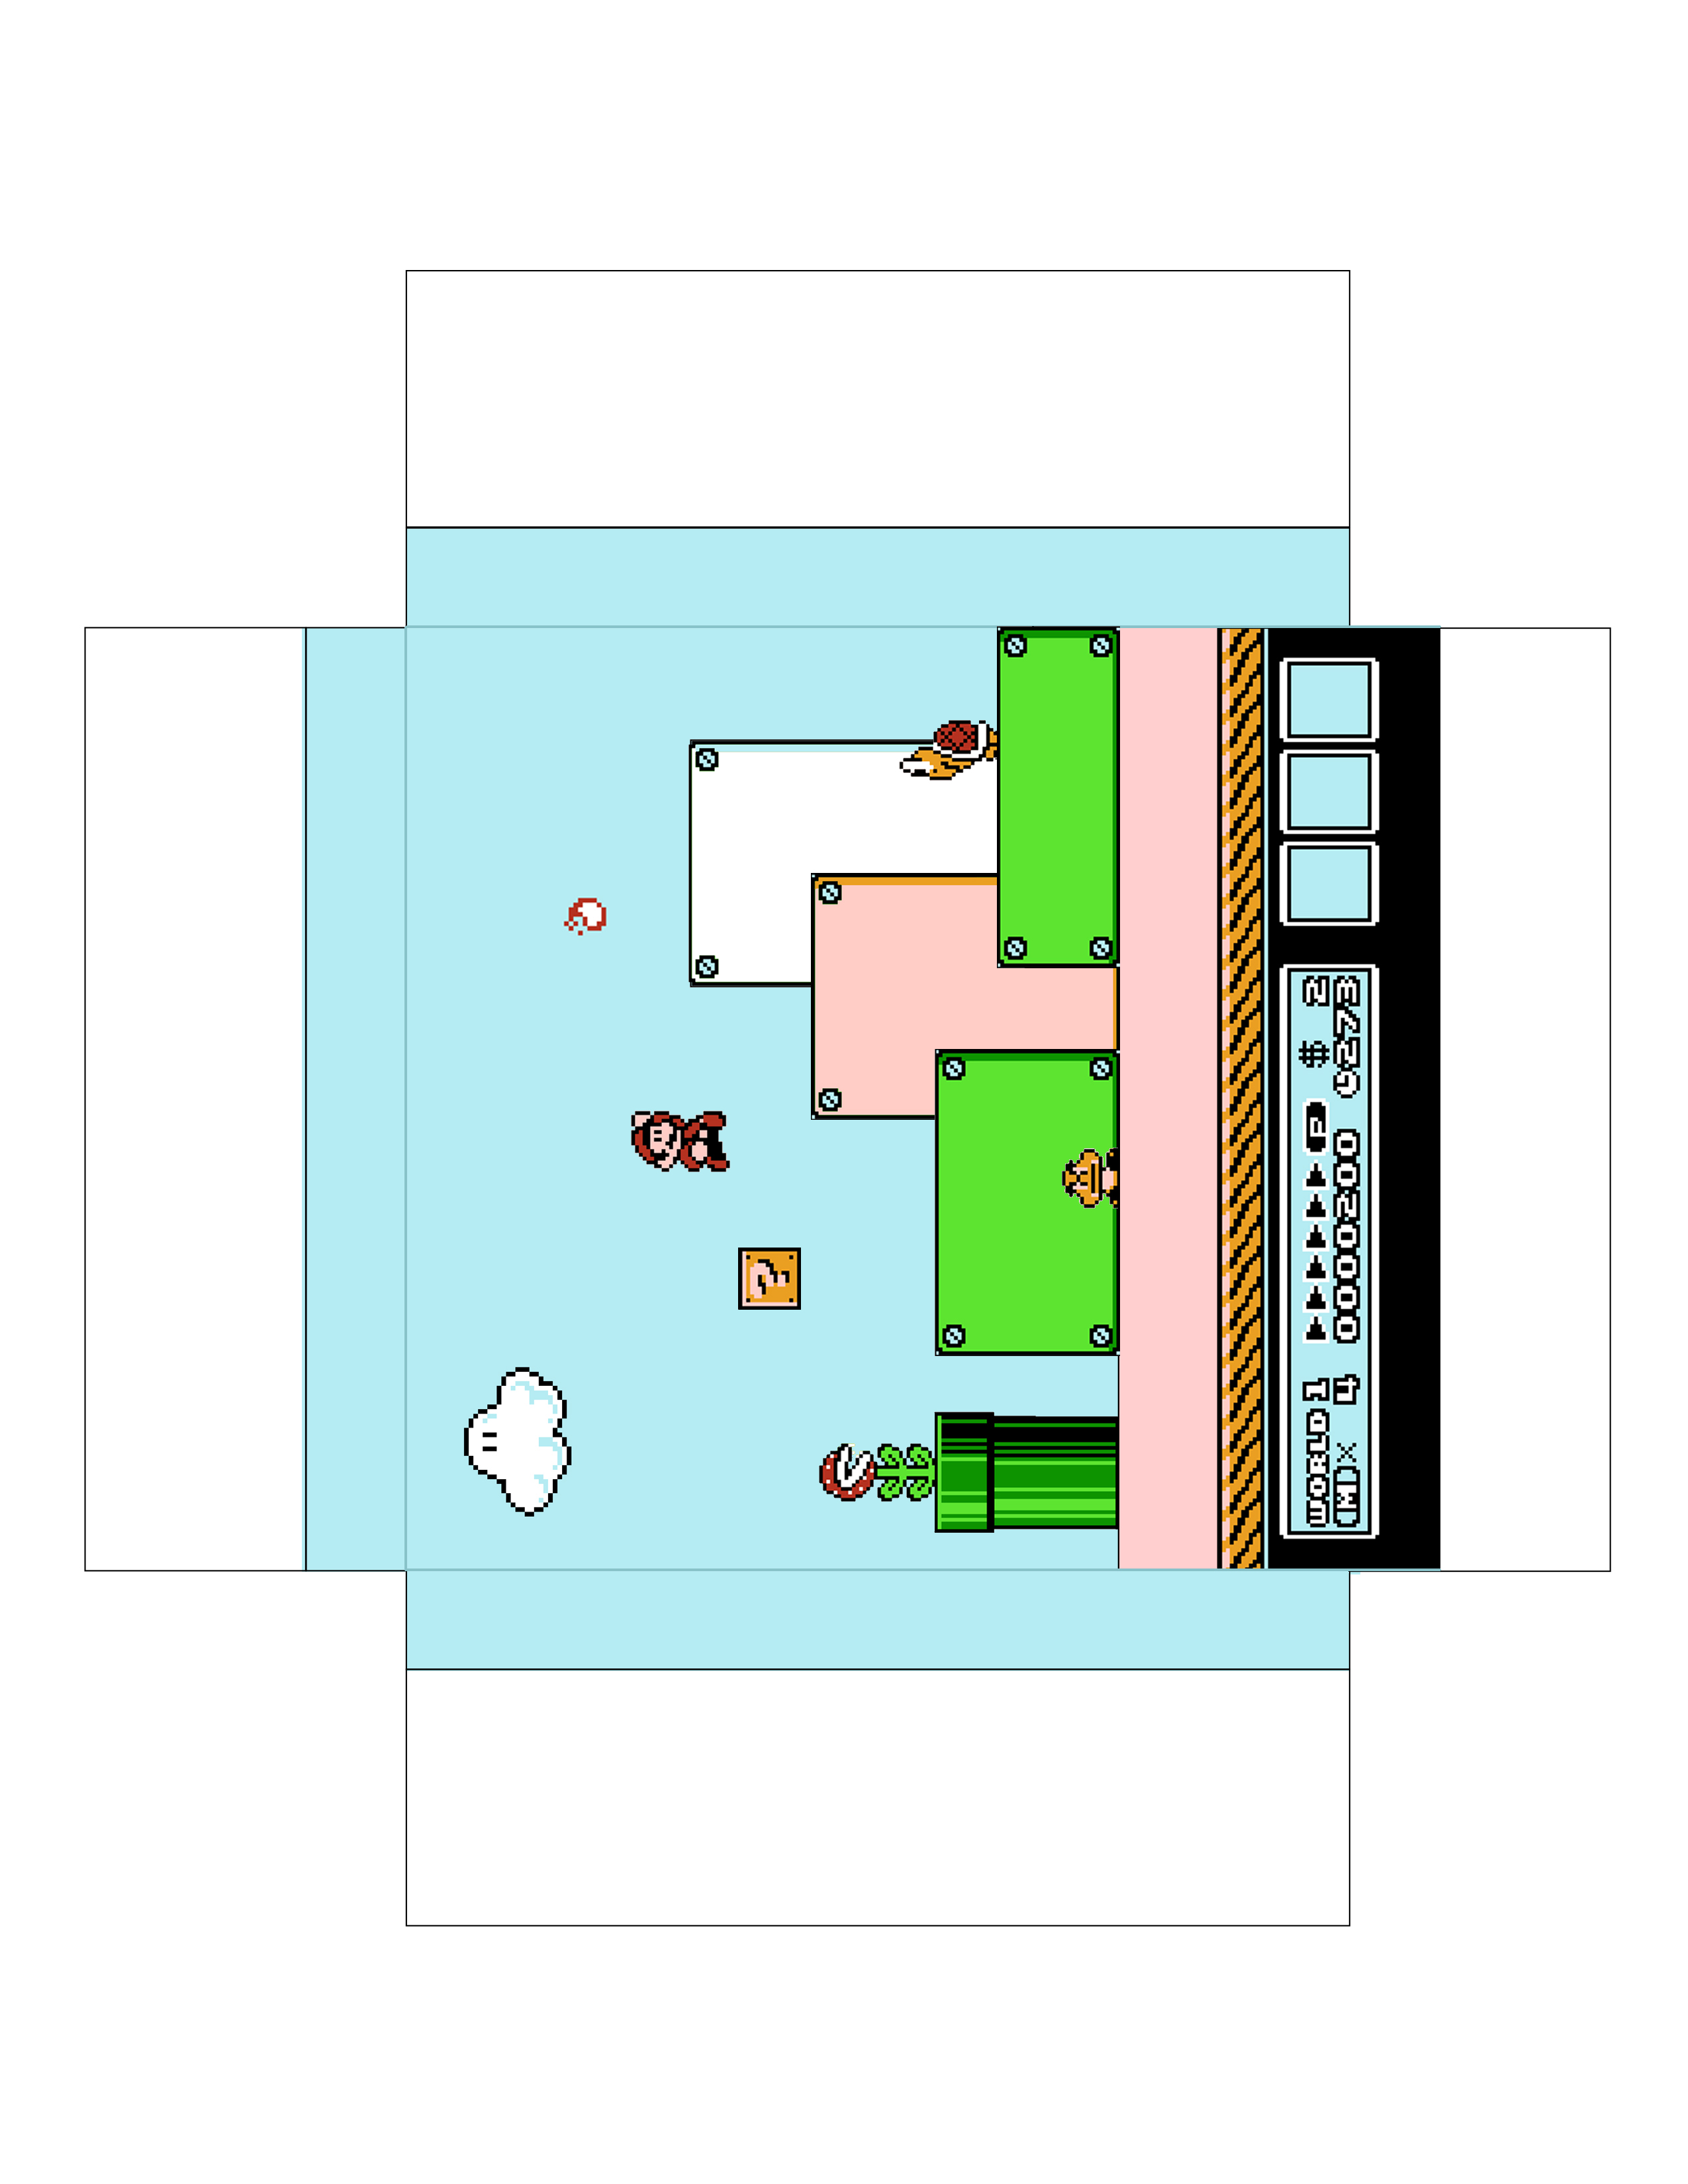
UPDATE: Here is a simple template, just cut and fold into a box shape, then affix to back of Ribba frame:
Original post as follows:
A few weeks ago I posted this idea about using picture box frames to display video game dioramas - specifically screenshots. I even described what a Mario one would entail. Shortly after I decided to make that idea a reality.
Making this possible is the RIBBA, a picture box frame from IKEA. These are approx 9.5 x 9.5″, with a mat frame of 4.75 x 4.75″. The box is about 1.25″ deep, and is a popular item for displaying LEGO minifigs and other physical objects. These are only $10.
I could have discarded the mat and used the entire box to display this screenshot, which was my original intention. But then it became difficult, as the 9 x 9″ interior wasn’t friendly to my printer, with a max 8.5″ width setting. I also had concerns about wasting too much paper again, and the weight of objects sitting in the box.
Then I read the mat could sit at the back or the front of the frame (against the glass), thanks to an internal divider. I then decided to make a small 4.5 x 4.5″ screenshot, with a depth of only .5 inches. I could have went even further back, but I wanted the question mark block to be close to the viewer.
I am pleased to report this went quickly after I printed it out. The whole sky box is taped against the mat, which is great if I want to reuse the mat again. Much of it is taped, save for the characters being glued in.
Going forward, I’d like to do a version 2.0 of this design with an LED question mark block. There is plenty of room in the frame to store electrical guts and batteries. Might even illuminate the score board too, making it look like this old alarm clock design I made.
Here is the template. You’ll need a RIBBA frame (you can order them online, see above for the link). Do not re-size the images, print as-is to fit the frame. If there is a warning about cropping, ignore it. Everything you need is well within the safe printed area. Use Card Paper, not regular paper which is flimsy and won’t hold up.


I recommend you punch out all the yellow boxes on the background image first (a lot of tabs are to be inserted here), then cut out and fold. Tape to the back of the mat frame. The tape is so handy for this part, as you can reset and line-up to the frame easily. You just need scotch tape.
Then install the question mark block, the white block, the green/pink/green block combo, and lastly the the pipe — in that order (with tape). The pipe and white block have supports to keep them upright and away from the backdrop.
Lastly add all the characters with glue. It is impossible to cut these pixel-perfect, this being so small. Do the best you can! Lastly throw into frame and hang on the wall or sit on the desk. Enjoy.
It turned out really great being a smaller screenshot. Has the same kind of detail as a ship-in-a-bottle. Okay a slight exaggeration. It looks pretty darn cool on the wall. Very 3D, of course.
I removed the black drop shadow from the game graphics, as all the actual shadows look really nice. I managed to find this section in the first level of Super Mario 3, and it was perfect! The area was populated with 3 different enemies, a question block, a pipe, and a cloud. Vintage Mario.
I know it’s asking a lot to require an IKEA frame for this project, but if this is popular enough I will continue to output Papercraft models for the RIBBA. I already have Street Fighter II in mind.
UPDATE: I did a second version, which assembles much like the Question block from the first one. I also added clouds that are floating in space. This one is more advanced.


Hey, I really liked making this! Thanks!
Loved this! I just finished mine and it turned out amazing.
I put a photo of the finished product in this tweet:
Thanks for sharing and I really hope you do another one.
Very nice. I would love to see one of the final scene of the Original SMB first level, with the steps and flagpole and just a hint of the castle beyond.
Would this work with any shadow box? I would need to print one of each of the 4 cutouts? Thanks.
This is sized for the IKEA Ribba. If you want to use another shadow box you’ll have to resize the art accordingly.
This is brilliant!
Thanks for sharing this great idea. After making one for my own I decided to create a new one of Super Mario Bros 1 first level. I hope the link to my Facebook image will work for you:
That’s awesome! Are you posting it online for others to do as well? Do you have a link?
Dave, I’ve send you the images by mail. I don’t have a direct download link available.
Did mine today. Awesome result!
Thanks for sharing!
Awesome work! It looks much better than mine.
Thanks! I loved doing it so much that I’m currently working on a Metroid one! I might go for Samus’ first appearance in the original Metroid on the NES:
I’ll let you know and share if I manage to do something interesting…
hey, tell me one thing - i bought ikeas ribba frame (exactly the same size, but in Poland, which costs circa 10$, so it must be that frame), and the picture doesn’t match 😦 it’s way to big for this little “ivory” paper frame inside, it covers way to much of mario art, i had tu cut it by myself… i did not change any size of your art, i’ve just printed like it’s here.. have no idea, but it not looks like yours ;(
The frame is the 9×9″ one, the picture opening is 4.75×4.75″, and the art is sized for 8.5×11″ paper. The mario art folds into a box shape and goes behind the matte frame opening. If it’s way too big maybe you haven’t folded it yet? There’s another picture in the comments to give you an idea.
i’ve actually folded it, but it sill doesn’ fit at all 😀 i have no idea what’s wrong, so i made my own version - nothing special, but it’s a gift 😉 (but yours is waaaay better!) - anyway, thanks for idea, xoxoxo
You’re the first to have issues with it (of the thousands of people who downloaded it). Maybe the printer scaled it too big? Sorry to hear about your problem.